Sometimes a first-time maple syrup maker will end up with a finished syrup that is thinner than they thought it should be. I know this happened to me the first time I made my own homemade maple syrup. The first thing I thought is: “Can I reboil this to make it thicker?”
This is an easy fix. The answer is: Yes, absolutely you can reboil maple syrup to make it thicker. You can do this after it’s cooled down and you realize it’s too runny, or even after it’s been been put in jars and stored away for some time as long as there is no sign of spoilage.
I’ll give you some tips below on several ways on how to tell when maple syrup is done.
Why is My Maple Syrup Watery
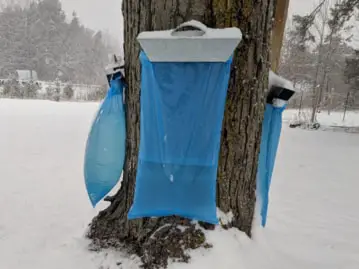
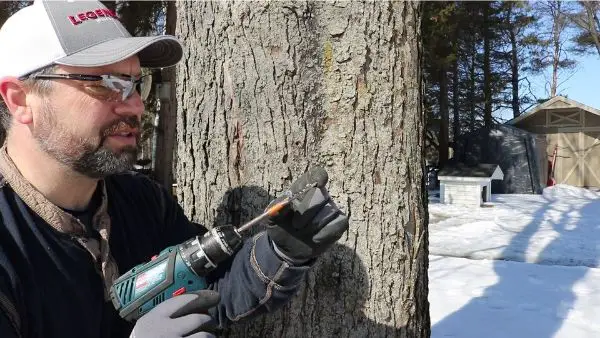
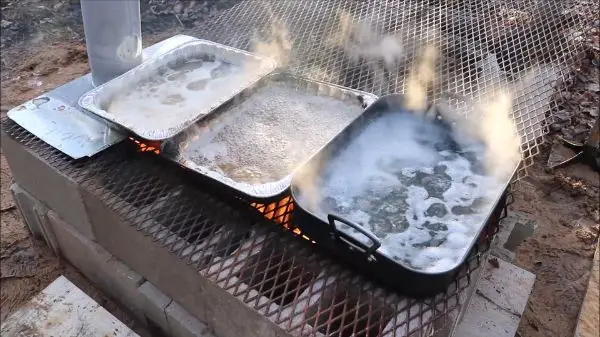
Maple sap starts out as mostly water with around 2-5% sugar content. Most of that water needs to be boiled off or turned to water vapor by evaporation. This is usually accomplished over a hot wood fueled fire by placing the maple sap in open, shallow pans with a large surface area to speed the evaporation process.
As the water evaporates the sugar concentration continues to rise. As the sugar content keeps going up so does the boiling point of the sap. Then depending on your elevation and the atmospheric pressure, the sap reaches a temperature where the sugar content is 66.9% and it is finally done.
How to Determine When It’s Done
There are four common ways to determine when maple syrup is finished. We’ll start with the least scientific method and work our way up from there to the most accurate method.
Spoon Test
The spoon test is how the early pioneers used to tell that maple syrup was the right consistency. It’s really nothing more than dipping a spoon into the boiling syrup and pulling it up while watching how the syrup comes off the spoon. If the syrup drips or runs off than it is not done yet. Finished syrup will “sheet” off the spoon. This may be familiar to those that make jellies and use this method to check the gel point.
For someone new to making maple syrup this method is very easy to get wrong. Doing it by this method usually ends up with syrup that is the wrong consistency. It will either be thin and runny or it will cook too long and turn into maple sugar and crystallize in the jar as it cools. Only when someone has boiled down many batches of maple syrup can they get somewhat proficient at this method. But even then, it is best to use one of the other two methods described below.
On my second attempt at making homemade maple syrup, I boiled the sap longer than on my first try. I could definitely notice a difference in the how the syrup dripped off the spoon while it was still sap compared to the sheeting that took place as it reached it’s final temperature. I didn’t rely on this method, but over the many batches since then I’ve gotten a pretty good feel for when it’s finished by observing how it falls off the spoon.
Temperature
Monitoring the temperature of syrup can be a very good way to determine when the syrup is done as long as a few details are carefully followed.
Maple sap becomes syrup at 7.5 degrees F above the boiling point of water. That’s the tricky part because the boiling point of water can vary due to the elevation of your locale and the barometric pressure at that given time. The best practice is to use an accurate thermometer to test the temperature of a pot of water that is at a rolling boil.
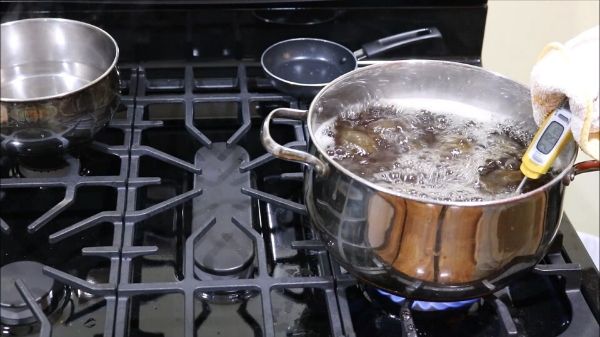
For this example, let’s say that the water boiled at 212. If we add 7.5 the syrup should be finished at 219.5 degrees. As the syrup gets closer to this temperature it will start rising pretty quick and you must observe very carefully. When I start getting readings of 219 I will keep moving the thermometer around to make sure the temp is consistent. My thermometer doesn’t have half increments so I take it up to 220. I’ve had it go from 219 to 222 in a matter of minutes so be careful.
Once your syrup has reached to optimal temperature, remove the pan from the heat. Have some jars simmering in a pot of water to ensure they are sterile and just ladle or pour you syrup in and cap them off.
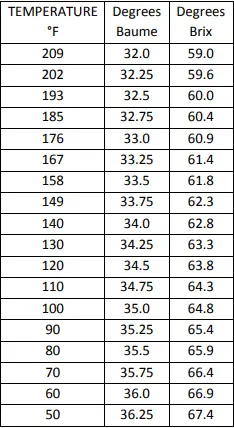
Specific Gravity
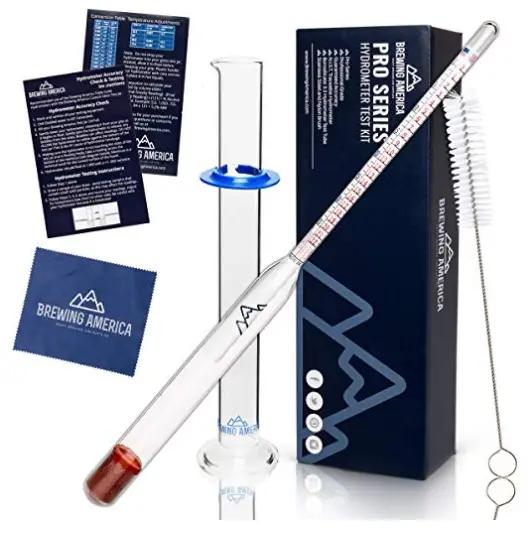
The specific gravity of maple syrup is measured with a hydrometer. A hydrometer is a glass bulb that floats in a cylinder of maple syrup. The hydrometer is usually marked with two different scales – Baume and Brix. How high it floats in the syrup will determine what the percentage of sugar the syrup contains.
One must still use a thermometer with this method because the specific gravity of the syrup changes with temperature. This chart shows that relationship:
When purchasing a hydrometer it will come with complete instruction for use. Check my recommended products page for a complete list of maple syrup supplies.
Refractometer
A refractometer is used to measure the sugar percentage in not only maple syrup, but also could be used for fruit, honey, wine-making and home-brewing. This is the most precise way to measure sugar content and the price of entry-level refractometers makes them a must have for the homesteader wishing to get the perfect consistency of their maple syrup.
Both hydrometers and refractometers can have multiples uses if a homesteader gets into maple syrup, wine-making or home-brewing. I have done some of each of these and I plan on picking up a refractometer to start using. This one from Amazon has a really high rating and is very reasonable in price.
Finished Syrup Weight
A gallon of maple syrup will weigh 11 pounds whereas a gallon of water weighs 8.34 pounds. This difference illustrates the difference in the specific gravity and shows that maple syrup weighs a good bit more than water.
What Happens if You Don’t Boil it All the Way to Finished?
If too much water is left in the finished product there is a greater chance of spoilage. It will also be very runny and not the best consistency for pancakes. If you want to reopen all your finished jars and reboil the syrup to the correct specific gravity, it is perfectly okay to do so as long as there is no sign of spoilage.
I have experienced a little bit of mold growth on a couple of my jars of syrup. I wiped out the mold and still used the syrup with no ill effects. If there was an excessive amount of if after wiping it out the syrup had a weird smell or flavor I would throw it out.
What Happens if You Boil Maple Syrup Too Long
Maple syrup that is boiled too long will almost certainly form sugar crystals in the bottom of the jar. This may not be apparent in unopened jars on the shelf at room temperature, but once a jar is opened and stored in the refrigerator crystals will most likely form.
Boiling even longer will result in the formation of maple sugar and is sometimes done on purpose to make maple candies and flavorings for other products.
Regardless of the method used to determine the finished product there is no doubt that your first batch of homemade maple syrup is going to be so delicious because you’ve made it yourself. For a video playlist of making maple syrup at home click the link here.
For my list of recommend maple syrup supplies go to my recommended products page.