Homesteading doesn’t have to be huge gardens, sprawling pastures, massive barns or livestock roaming everywhere. Although that would be a dream come true for many people, homesteading can also be on a city lot, suburban lot, or couple acre small homestead.
This article will give you some ideas for smaller projects for a small scale homestead. All of these are fairly inexpensive and can be accomplished in a weekend. These projects are to help the small scale homesteader save money, improve their harvest, ensure quality food for their family, and be somewhat more self-sufficient.
Build a Rainwater Collection System
Harvesting rainwater will reduce a homesteaders dependency on the municipal water supply. It can also help reduce flooded areas on your property. Most states don’t have any restrictions on collecting rainwater and some even encourage it. Other states may have a few regulations but in general if it’s for your own use on your property you’re probably alright. For more information on each states regulations, check out this website.
This project can be as simple as putting buckets or a barrel under your downspout or as elaborate as underground tanks with filtration and pumps. Our focus will be on the lower end of the scale and talk about a few different smaller collection vessels as well as using the contour of the land to divert water to where it’s needed.
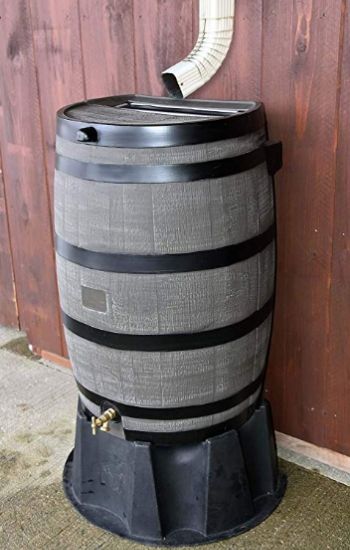
If you are not too concerned about the appearance of your rain collectors or if it’s in a concealed location, then an old plastic barrel or IBC tote will work just fine. A food grade barrel is best to be sure it didn’t contain any dangerous chemicals. If your rain barrel will be in sight and you would like it to have a nice appearance then this oak grain plastic rain barrel from Amazon.com will look great next to the house or on the patio.
The trick to making a rain barrel useful is to elevate it to put some pressure behind the flow from the spigot. Having the barrel at a higher elevation than the rest of your yard will also help with the amount of flow you can expect to get.
You could also use the contour of you land to divert water to a specific collection point that could store water for later use. This would be especially helpful in arid climates, but maybe not as useful in areas where standing water contributes to the mosquito population. Joe from Homesteadonomics YouTube channel has a series of videos that go in-depth on collecting rainwater in barrels, underground tanks, and small swales for planting fruits and vegetables in an arid climate. Here’s a link to his playlist of Rainwater Harvesting Videos
Build a Quail Hutch
Whether you call it a quail hutch, pen, coop, house, or aviary building a home for your quail can easily be accomplished in a weekend with construction lumber, hardware cloth, basic hand tools, and maybe a circular saw to make cutting faster and easier.
Although quail can be kept in small cages they will be much happier if they have a coop with access to a penned area so they can forage around on the ground. Quail do not like steep ramps so keep the coop fairly low to the ground. Ideally you should provide at least 1 square foot of space in the coop for each quail.
Another important feature to consider is adding nesting boxes. Quail are like chickens in that they prefer a nice secluded place to lay their eggs. Nesting boxes could be built into the coop or re-purpose plastic buckets for them to use.
Maybe the most versatile coop design is a quail tractor. A quail tractor is nothing more than an easily movable coop/pen combo that sits directly on the ground and allows the quail to forage for fresh greens, seeds, and bugs. The quail tractor can be moved around every few days to give them a fresh new area to explore.
Grow Mushrooms
Growing mushrooms in your basement or other dark room in your house is the perfect project for a small scale or urban homesteader. The success rate for growing mushrooms is highly dependent on purchasing high-quality spawn (not spores) and following the directions exactly. The four most popular types of mushrooms to grow in your home are listed in order of ease of success below:
- Oyster Mushrooms
- Lions Mane
- Portobello Mushrooms
- Shiitake Mushrooms
There are several methods to growing these different types of mushrooms. This is where finding a reputable source such as Stephen Russell’s The Essential Guide to Cultivating Mushrooms is almost essential for success. His book is great for beginners to more advanced growers. It is available on Amazon.com. Some methods he covers include:
- Ready-to-grow kits
- Premade spawn
- Shiitake plugs in logs
- Liquid culture
Although it is possible to grow enough mushrooms to sell and make some extra income, it’s a more likely approach to grow enough to meet your own needs at first. This gives you fresh food while be more self-reliant for your needs.
Start Composting
Everyone produces kitchen scraps or yard waste that can be composted. The resultant rich organic soil that is created from composting is a great addition to your garden. Even if your garden is in containers, organic compost will enrich the potting soil to give your spectacular growing results.
The first step to composting is deciding on which method to use. The method you choose will depend on how much compost you produce and how tolerate you (or your neighbors) are at looking at your compost. Here’s a list of different composting methods:
- Compost Pile
- Compost Bin
- Compost Tumbler
- With or without worms
The easiest but maybe not the most efficient is the compost pile. Really this is nothing more than throwing your compost directly on the ground in a pile. The pile needs to be large enough to work properly because as organic material rots it produces heat. This heat helps speed up the process especially during colder weather. A larger pile will help to retain the heat within the pile to quickly turn waste into soil.
The compost bin is a pile of compost that is contained by plastic, wood, or fencing to keep it from sprawling out to far. There are commercial plastic compost bins for sale, but using scrap material you already have on hand is also a great way to reduce your overall Eco footprint.
The simplest way is to screw 3 old pallets together leaving the front open for easy access. This is the system we’ve been using for many years and seems to work really well. You may have to rebuild it after 5 or 6 years as the pallets will start to rot too. I’ve also seen homesteaders drive some stakes or posts into the ground and wrap them with fencing material or chicken wire to create the sides of the bin.
The compost tumbler is basically a barrel that can rotate on a frame. Organic material is added to the barrel, and periodically rotated for several weeks to several months until the compost has broken down into soil. These compost tumblers can be purchased or easily made from a used 55 gallon plastic drum, a piece of pipe and wooden frame.
One of the most important factors in a successful compost pile is to maintain the correct moisture level. Compost that is dry will not have the proper conditions for the microbes to thrive. Compost that is too wet favors an aerobic microbe population and the compost will become slimy and smelly. The perfect level of moisture will be between 40% – 60%. Experience will give you a good indicator of proper moisture, but in the meantime, you could use a compost/soil moisture meter like this one on Amazon.com.
Another question often asked by gardeners is “should you add worms to your compost pile?”. This answer to this is: it’s not really necessary, but worms such as Red Wigglers are beneficial to compost piles. If your compost pile or bin is directly on the ground, worms will naturally find their way into it.
There are sometimes so many worms in our compost pile that when me and the boys are going fishing the compost pile is the first place we look for bait. Worm compost is actually a very valuable soil amendment that is high in nutrients for your plants. If you’re interesting in exploring compost worm farming, I’ve discovered a fascinating video from Geoff Lawton’s YouTube channel that goes into great detail.
Plant a Berry Patch
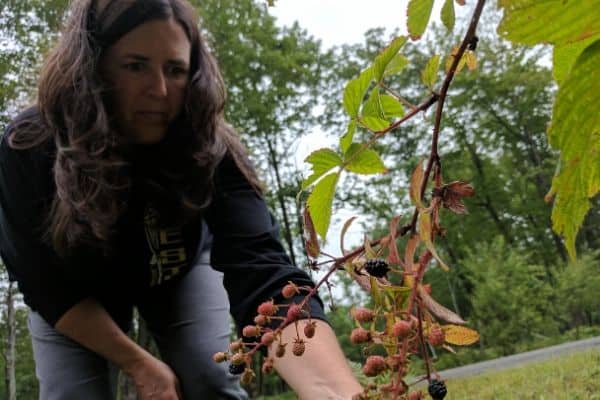
A berry patch is a great way to produce a lot of fresh fruit in a small space. We have several berry patches here on the Country Family Homestead. We have blackberries, raspberries, strawberries, grapes, and even hardy kiwi. The largest patches are the strawberry and raspberry patches which are still only take up about 6′-8′ wide and about 20′-30′ long. They both produce enough berries for to make jam and enjoy tons of fresh fruit for picking every time we walk by.
From our grape vines we’ve also made juice, jelly, and wine. Grapes and brambles like raspberry and blackberry are great to plant along a fence line and could also double as a privacy screen. Here’s a list of my top 7 different types of berries:
- Blackberry
- Strawberry
- Blueberry
- Raspberry
- Grape
- Boysenberry
- Cranberry
Berry plants can be purchased from any reputable online seed company, at a local nursery, or even from a neighbor. We’ve transplanted blackberries, strawberries, and grapes all from cuttings from established patches. Berry patches can get out of control if not cut back, so asking a neighbor with berries for a few cuttings will be an easy conversation.
Plant a Mini Orchard
Nearly every type of fruit that grows on a tress can be found in a dwarf variety that is perfect for a small yard. Keep in mind that some varieties of fruit trees are self-pollinating and some will require cross pollination. This table below will give some general guidelines:
| Self-Pollinating | Cross-Pollinating |
| Apricots | Apples |
| Nectarines | Pears |
| Peaches | Sweet Cherries |
| European Plums | Japanese Plums |
| Tart Cherries |
Self-pollinating fruit trees could actually produce more fruit if there is a cross-pollinator available. The fruit tree varieties that do need another tree for cross-pollination will need a specific variety that is compatible as not all apple varieties will cross-pollinate each other. Check the description of the variety you’re planning to purchase for more information.
Some fruit trees may take several years before they produce fruit, and some will produce the very next year after planting.
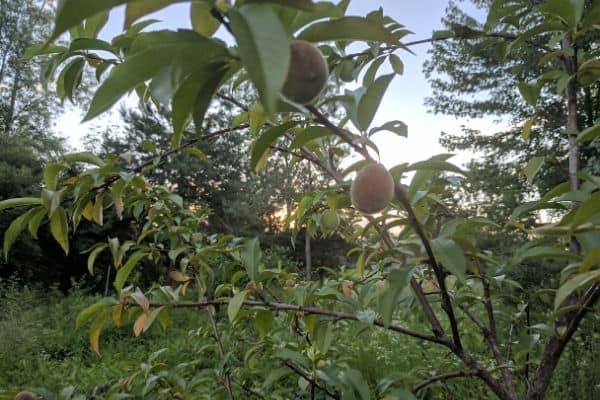
We bought a peach tree from Tractor Supply a few years ago that had many blossoms on it when we brought it home and planted it. That tree produced about a dozen wonderfully sweet and juicy peaches that first season.
The next season it started with over 30 peaches until a whitetail buck came into the yard and used the trunk as a rubbing post. I think he ate the peaches too because they were just all of a sudden gone one day. That tree has clung to life since but I don’t think it will make it another year. It barely even had leaves on it last year and not a single blossom. It’s too bad because it had such delicious fruit.
Optimize/Expand Your Pantry
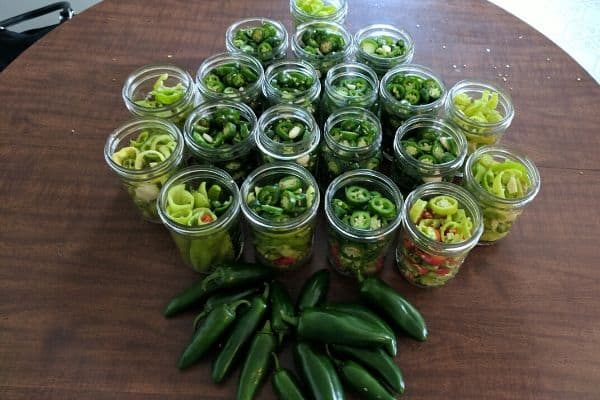
Part of being a homesteader is preserving and saving some of the food you’ve produced during the growing season. Even if you didn’t grow it all yourself, buying fresh fruit and vegetables during the peak of season is less expensive at this time of year and a frugal homesteader will take the time to stock up the pantry.
Having a dedicated space for storing food will help keep you organized and make rotation easy so you don’t let anything get too old and have to be thrown out. A pantry off the kitchen is ideal if you have that space available. Overflow can be kept in the basement or cellar along with cold storage of potatoes, squash, garlic, and onions. The basement is also a great location for a deep freezer if that is your preferred method of storage.
Plant a Herb Garden
Having fresh herbs available for cooking is a culinary enthusiasts dream. Imagine walking out the back patio door to pick some fresh mint, rosemary, or thyme to use in tonight’s dinner. Here’s a list of the 10 best herbs to grow:
- Basil
- Mint
- Parsley
- Rosemary
- Chives
- Oregano
- Sage
- Thyme
- Dill
- Coriander
Growing herbs can be one of the easiest ways to get started into gardening. They even make wonderful windowsill gardens that are even more convenient to use in the kitchen.
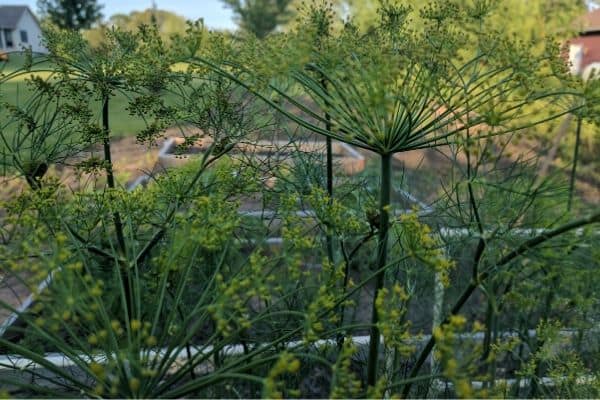
Herbs can be used fresh during the growing season or as the season winds down they can be dried for use later. Some herbs produce seeds that can be used for seasoning such as dill and coriander.
Build a Cold Frame
A cold frame is a little mini greenhouse that covers up a raised bed with a clear plastic or glass to allow the raised bed to warm up faster in the spring. This allows you to get a jump-start on the planting season. Hardy vegetables are best for growing in cold frames because of the dip in temperature at night. These will be salad greens, lettuces and cabbage. Here’s a list of plants to grow in a cold frame:
- Lettuce
- Spinach
- Kale
- Scallions
- Leeks
- Chives
- Arugula
- Broccoli
- Cabbage
- Cauliflower
- Swiss Chard
- Radishes
- Beets
- Carrots
A cold frame can be made from wood with a plastic top. An old wooden door full of windows also makes a great top to let the light in. Sinking the cold frame into the ground a bit will help insulate the soil inside and protect your plants from frost. Ideally the top of the cold frame should be angled about 15 to 20 degrees and positioned to face south to get the most sunlight exposure in the early spring.
Cold hardy plants for cold frame planting will tolerate the cold nights fairly well and could be planted as early as five weeks before your last anticipated frost. We usually plant our garden between Mother’s day and Memorial day so the cold frame would get planted around mid-April here in our climate.
Build a Potato Grow Container
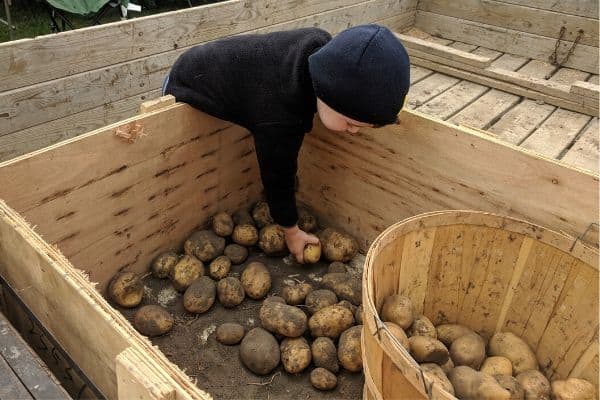
Potato towers or potato grow bags allow you to do two things. First it allows you to continue to pile dirt up the stem of the potato as it grows. The second is supposedly you can remove a board or open a flap on the bag to harvest potatoes while the plant is still growing.
We have grown potatoes here on the homestead for many years and we’ve always planted them directly in the soil. We do plant them deep though and hill them up as they grow. We even have “potato hillers” that mount on the underside of our old Farmall A that can easily do this for long rows.
I’ve considered trying a few potato grow towers to try a few different varieties without committing to long rows of them and to also try to harvest some as the plants are growing. I’m a little skeptical on this because normally you’d wait until the vines die off completely before harvest.
Before you decide to try this project I would recommend doing a little more research first. Here’s a video from YouTube that says this system did produce more potatoes than the conventional method.
Summary
Having a small homestead or even a simple suburban backyard should not stop you from enjoying these homesteading projects. Homesteading is about producing for yourself and being less reliant on others. These projects help you to do just that.